Tour Guide Web Part
Overview
The Tour Guide webpart is a powerful tool that enables you to create a captivating guided tour of the current page. With this feature, users can easily familiarize themselves with the various components and functionalities of the page. To initiate the tour, all it takes is a simple click on the web part.
Once the tour is activated, users will be seamlessly guided through each pre-assigned web part on the page. As they navigate through the tour, they will encounter informative descriptions that provide insights into the specific functions and purposes of each web part.
Installation
Installation Steps
To install LiveTiles Tour Guide, follow these steps:
Install the app in either your SharePoint tenant app catalog or in a site collection app catalog.
Go to the SharePoint site where the LiveTiles Tour Guide web part should be installed.
Add the app LiveTiles Tour Guide to the site.
Create a new page or go to an existing page where you would like to add the LiveTiles Tour Guide web part.
Click Edit to edit the page.
Click the + and search for the LiveTiles Tour Guide web part.
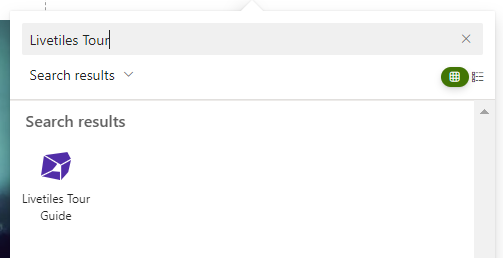
Select LiveTiles Tour Guide and then continue to Set-Up to configure the web part.
Set-up
Initially, when the web part has been added to the page, the Tour Guide starting point is greyed out indicating that no items have yet been added to the guide.

Click the pencil icon to the left to configure the web part.
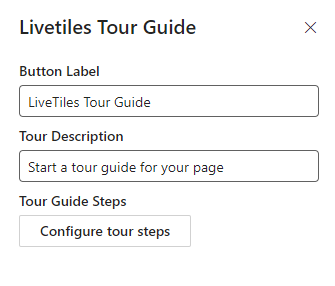
Button Label - Set the tour guide button label Tour Description - Set the tour guide button description Tour Guide Steps - Add the steps for each webpart to the tour guide
Adding steps to the Tour Guide
Click the Configure Tour Steps button to display the configuration UI to add the tour guide steps.
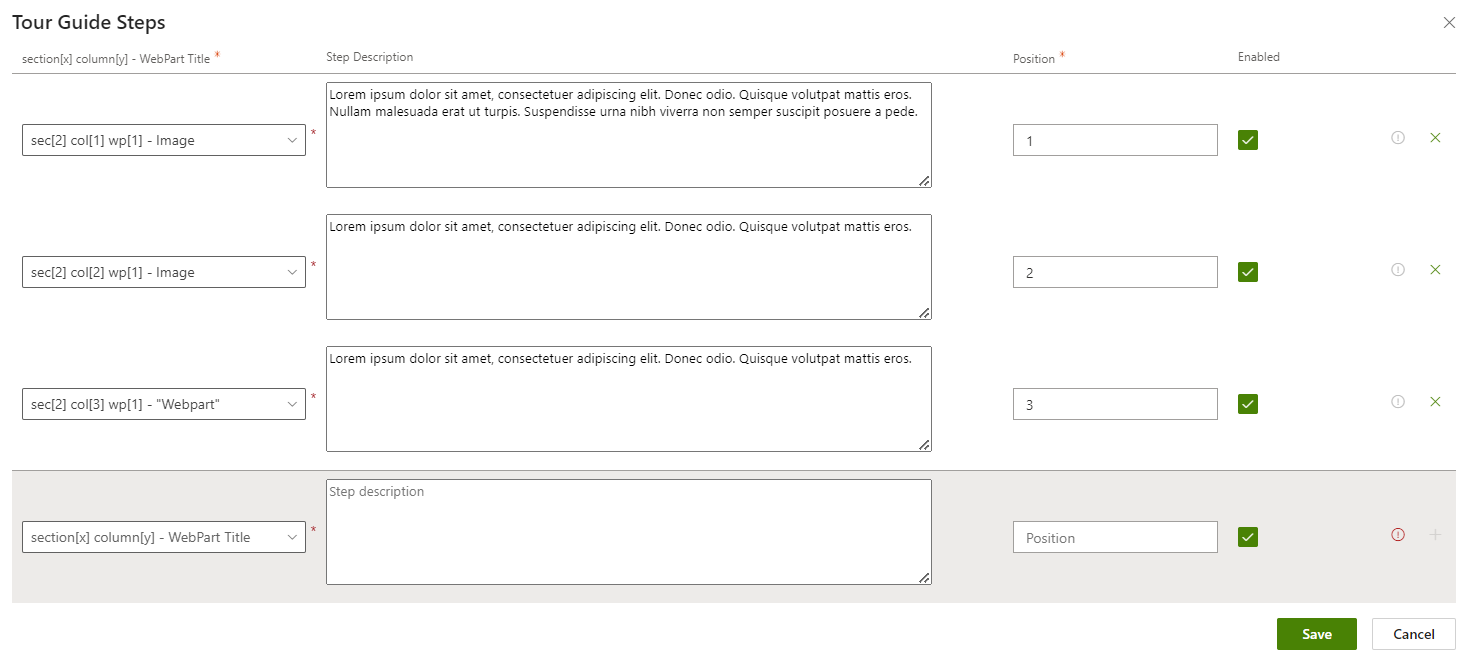
For each step of the tour guide you will set the following steps
- Webpart Selection - The left most dropdown, select the webpart you wish to add a tour guide step.
- Step Description - This field is the text displayed describing the webpart within the tour guide.
- Position - This is the position/order which the step will be displayed within the tour guide.
- Enabled - Enable/disable the step
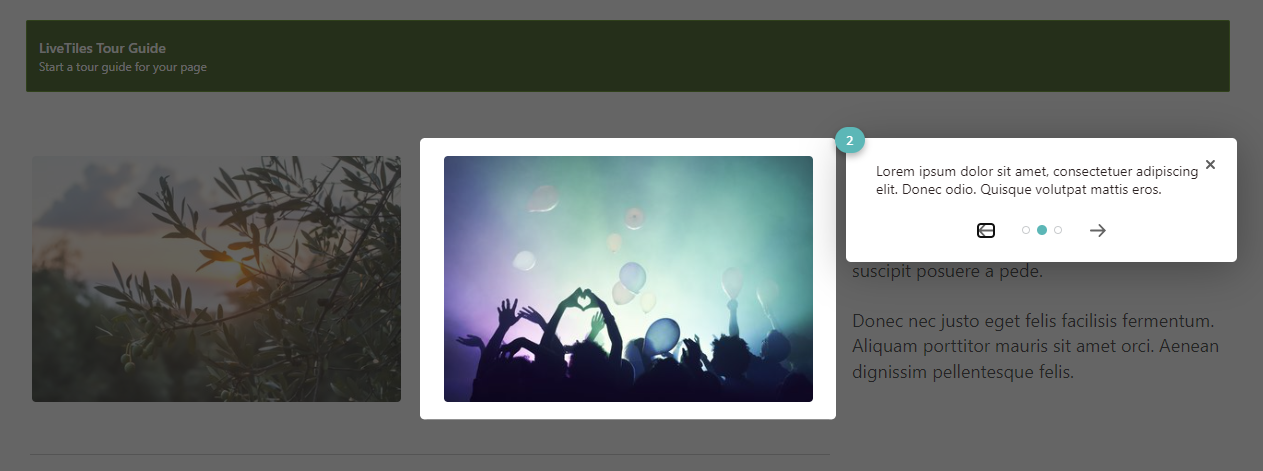
Activating the Tour Guide
To activate the guide, simply click on the Tour Guide web part. Once the tour begins, you have multiple options for navigation. You can utilize the previous and next arrows provided within the Tour Guide interface to move forward or backward through the tour. Alternatively, if you prefer keyboard shortcuts, you can use the left and right arrow keys to navigate accordingly.
If at any point you wish to close the guide, you can do so by either clicking on the provided "X" button within the Tour Guide interface or simply hitting the ESC key on your keyboard.