
Reach Events Web Part
Overview
This guide shows how to install and Set-Up the LiveTiles Reach Events Web Part,
There are 3 Templates to choose from Compact, List and Cards, each with different option's to configure the template.
Installation
Prerequisites
- The latest version of LiveTiles Reach Events (LiveTiles.Reach.sppkg) app package.
Installation Steps
To install LiveTiles Reach Events, follow these steps:
Install the app in either your SharePoint tenant app catalog or in a site collection app catalog.
Go to the SharePoint site where the LiveTiles Reach Events web part should be installed.
Add the app LiveTiles Reach Events to the site.
Create a new page or go to an existing page where you would like to add the LiveTiles Reach Events web part.
Click Edit to edit the page.
Click the + and search for the LiveTiles Reach Events web part.
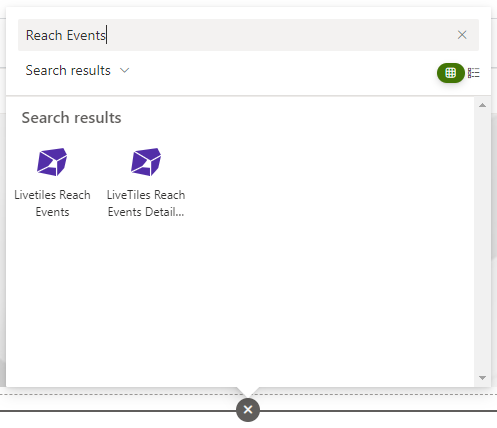
Select LiveTiles Reach Events and then continue to Set-Up to configure the web part.
Note: You will need a LiveTiles Reach subscription and will have to approve the Api Permissions to use the LiveTiles Reach Events Web part.
- Go to this page and login with your account and give consent. You will be redirected to the LiveTiles Reach start page.
- Login and give consent again.
- In case you don't already have a subscription create a new one.
- Go to SharePoint admin center.
- Go to the API management section.
- Under Pending requests you can see the Condense API permission request.
- To approve a pending permission request, select the request in the list of permissions, and on the toolbar, choose Approve or reject. In the Approve or reject access pane, choose Approve.
- This permission is used to display news from LiveTiles Reach with LiveTiles Reach Events web part.
Set-up
Once you have installed the app, set-up a Reach subscription and approved the api permission follow these steps to configure the LiveTiles Reach Events web part.
- Once the web part has been added to the page, This view will be displayed prompting you to edit the web part.

- Click the pencil icon to the left to configure the web part.
Configure LiveTiles Reach Events Web Part
Follow these steps to configure the web part
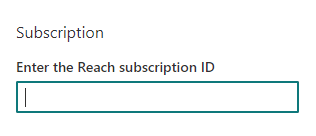
Enter your Reach subscription Id.
Select a template.
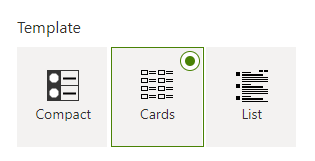
Templates
Compact
The compact template view displays the event items in a compact list with chevrons above and below for pagination.
List
The List template view displays the event items in a list with chevrons above and below for pagination.
Compact and List Template Option
The Compact and List template option allows you to set the Number of items to display per page.
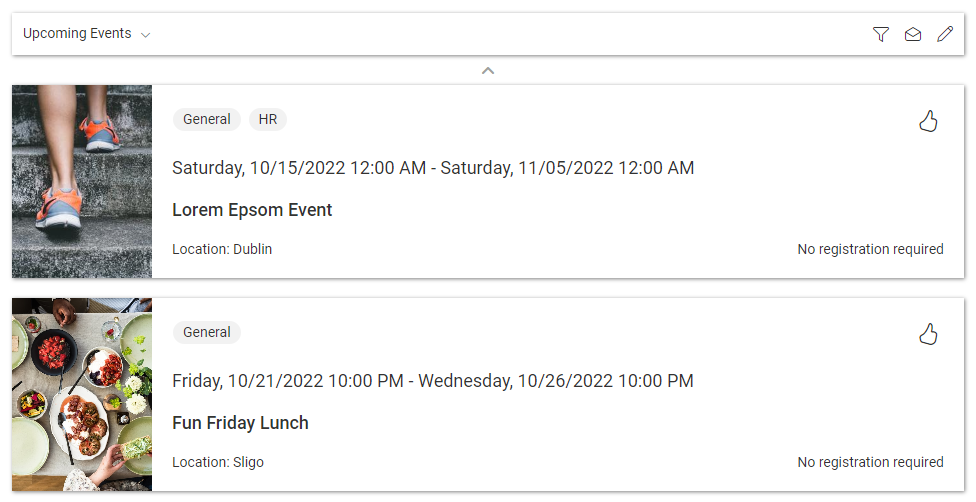
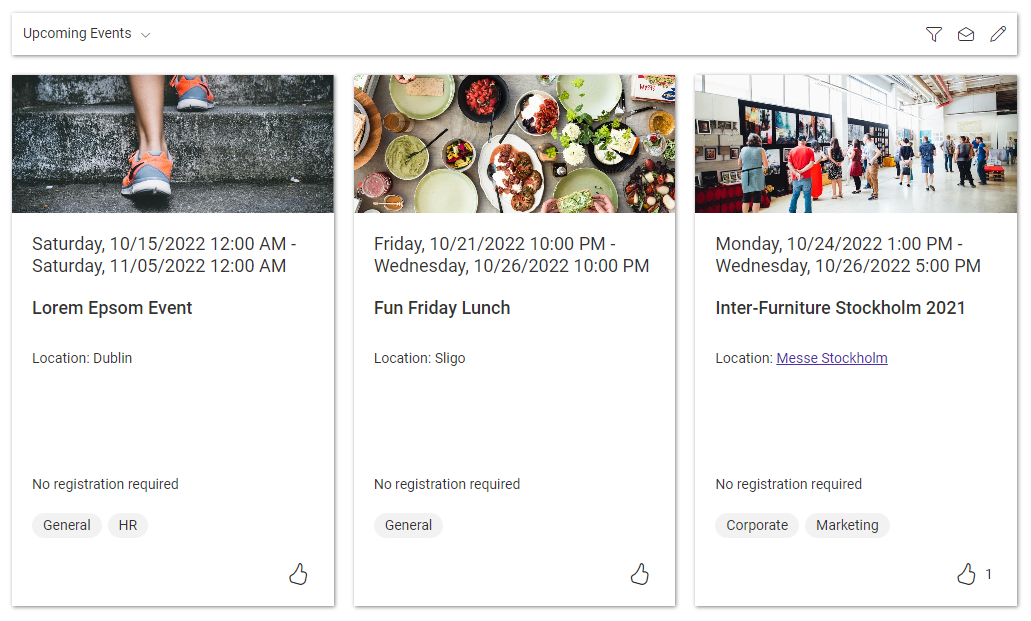
Cards
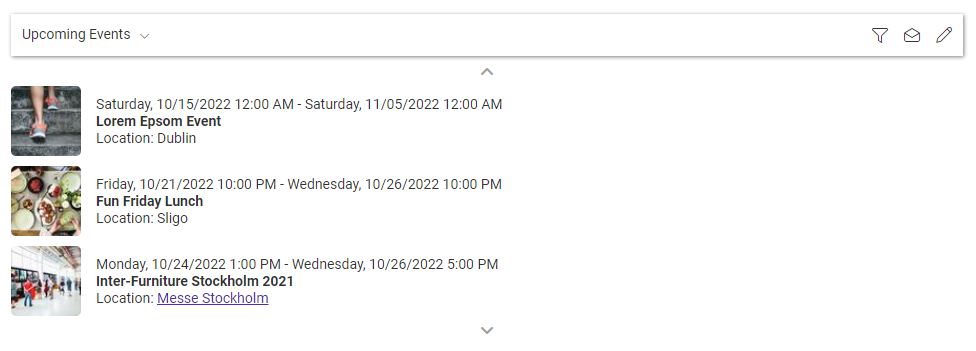
The Cards template view displays the news items as a grid of cards with pagination option's below.
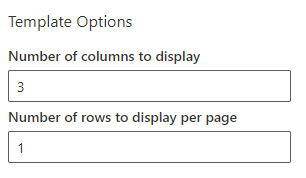
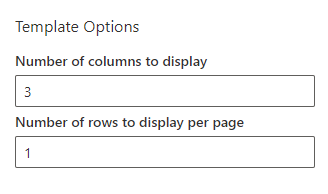
Cards Template Options
The Cards template options allows you to set up the cards in a grid by supplying values for the number of columns and the number of rows to be displayed per page.
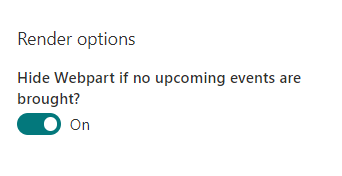
Render options
The Render options let you to enable the hiding of the Reach Events Webpart when no upcoming events are brought. If enabled, and no upcoming events(with the selected channels and keywords in the properties) are brought, the Reach Events Webpart will not be rendered. When events will be again brought, the webpart will be rendered as normal.
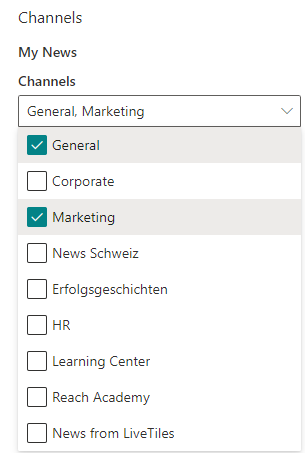
Manage Channels
The Manage Channels dropdown enables you to select multiple channels to filter the displayed news items.
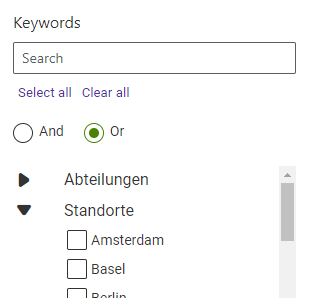
Manage Keywords
The Manage Keywords dropdown enables you to select multiple keywords to filter the displayed news items.
Detail View Option
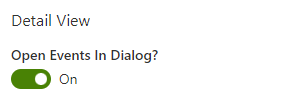
Open Events In Dialog Toggle
The 'Open Events In Dialog' toggle button gives the option to load the event item in a dialog box when clicked. This option is set to true by default.
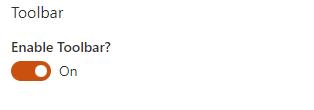
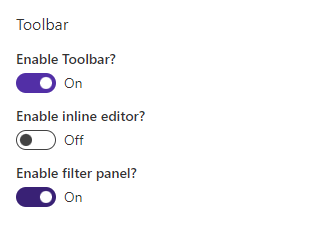
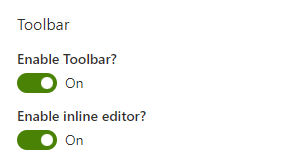
Enable Toolbar Toggle
The Toggle button gives the option to Enable the Toolbar for the selected template.
Toolbar
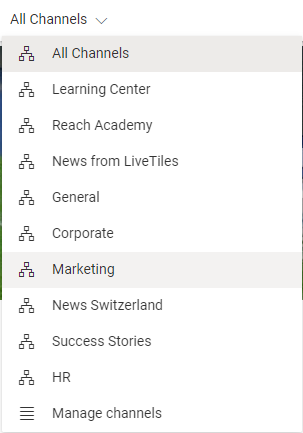
The Toolbar once enabled gives the ability for the user to filter news items by using the channels dropdown and will filter the events based on the channel selection, The channels available in the dropdown are determined by the channel selection made by an admin in web part settings. If no channels or keywords are selected the user can select from all channels and has the option the manage channel subscriptions.
Toolbar

Channels Dropdown
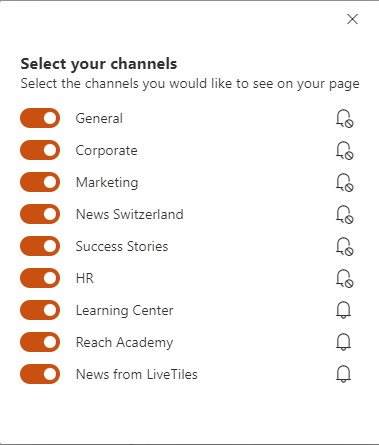
Manage Channel Subscriptions
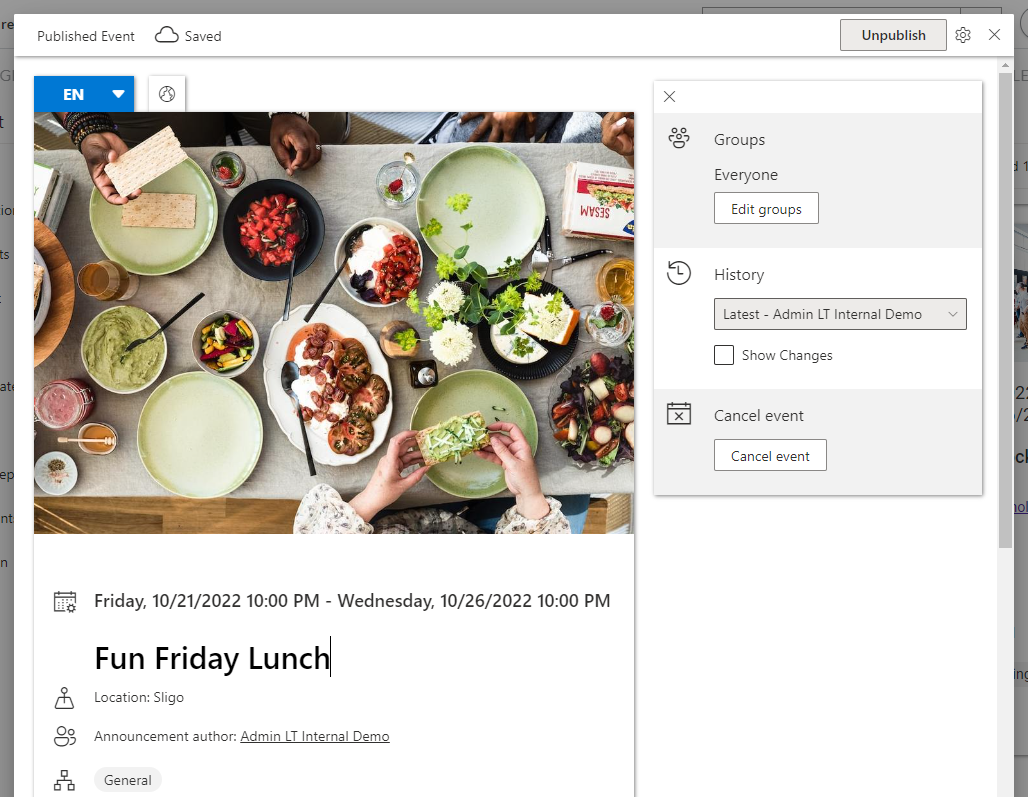
On the right side of the toolbar there are options for searching the events content, mark all event items as read and the pencil icon allowing the opening of the event editor dashboard.
Filter Panel In Toolbar
Filter Panel Toggle
In the web part settings there is a toggle to enable the filter panel in the toolbar.
Once enabled, You can click the filter icon to open the filtering option's in the toolbar.

In the toolbar you will now see the option's available for filtering.
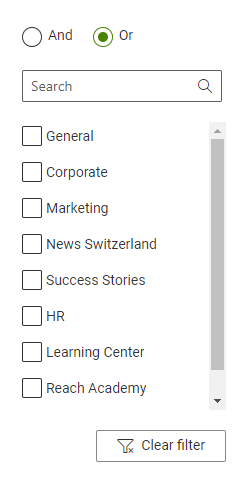
Channels Filter
In the channels filter panel you can filter the displayed event items by channel name and you have the AND & OR Mode option.
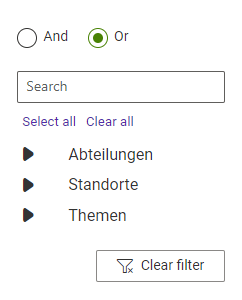
Keywords Filter
In the keywords filter panel you can filter the displayed event items by keyword and you have the AND & OR Mode option.
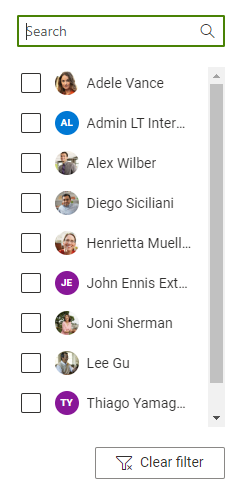
Author Filter
In the author filter panel you can filter the displayed event items by author.
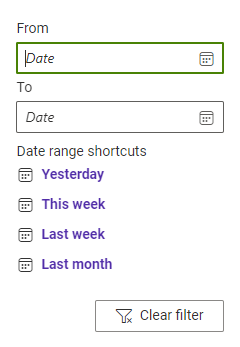
Publishing Date Filter
In the publishing date filter panel you can filter the displayed event items by Publishing date.
AND & OR Mode
Some Filter components contain a toggle which allows the user to choose whether multiple selections in the filter are applied in AND mode or in OR mode.
Event Editing
Inline Editing Toggle
To enable inline editing, use the toggle in the web part settings. Once enabled, clicking the pencil icon in the toolbar/detail view toolbar will open the event item in Sharepoint for editing. When the toggle is off, the event item will open in the reach web app for editing.
Event Item editing
When editing is enabled in SharePoint you can edit the news item and republish it.
Event Editor Dashboard
The Event Editor dashboard displays the events available in your subscription. When clicking an event item and with inline editing enabled, the event will open in SharePoint for editing.
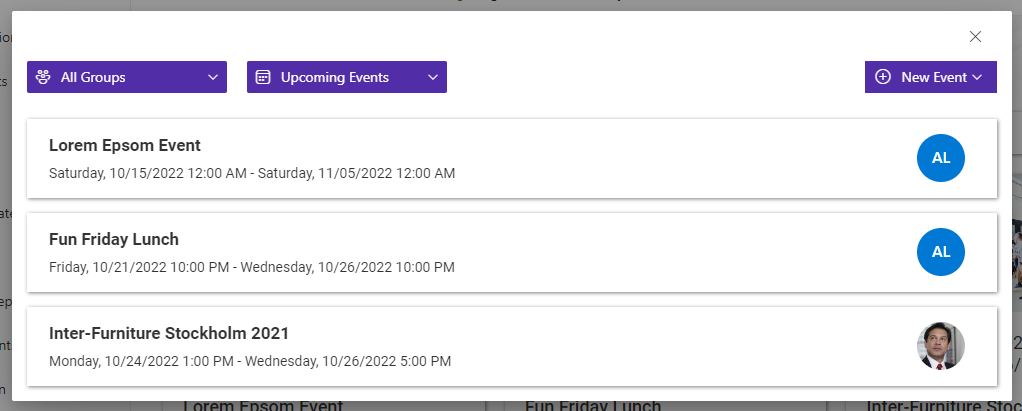
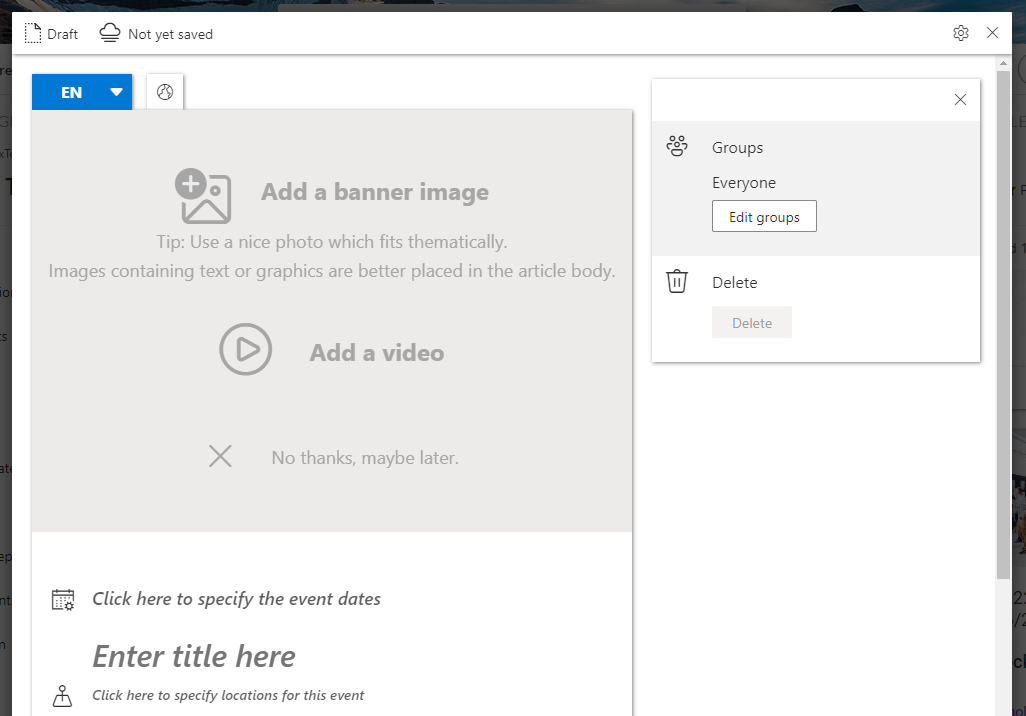
Clicking the New Event button will open the new event dialog, enabling you to create event items from within SharePoint.
Filtering
Filter Events By Channel Name in URL
To filter your view by channel you can append a channel name to your URL. Once this is set, the news on the page will be filtered by the name provided in the URL parameter.
eg . https://<-Your Reach Events page URL->?channel=General
Filter Events By Keyword in URL
To filter your view by keyword you can append a keyword to your URL. Once this is set, the news on the page will be filtered with the name provided in the URL parameter.
eg . https://<-Your Reach Events page URL->?keyword=HR
Detail View Web Part
Installation
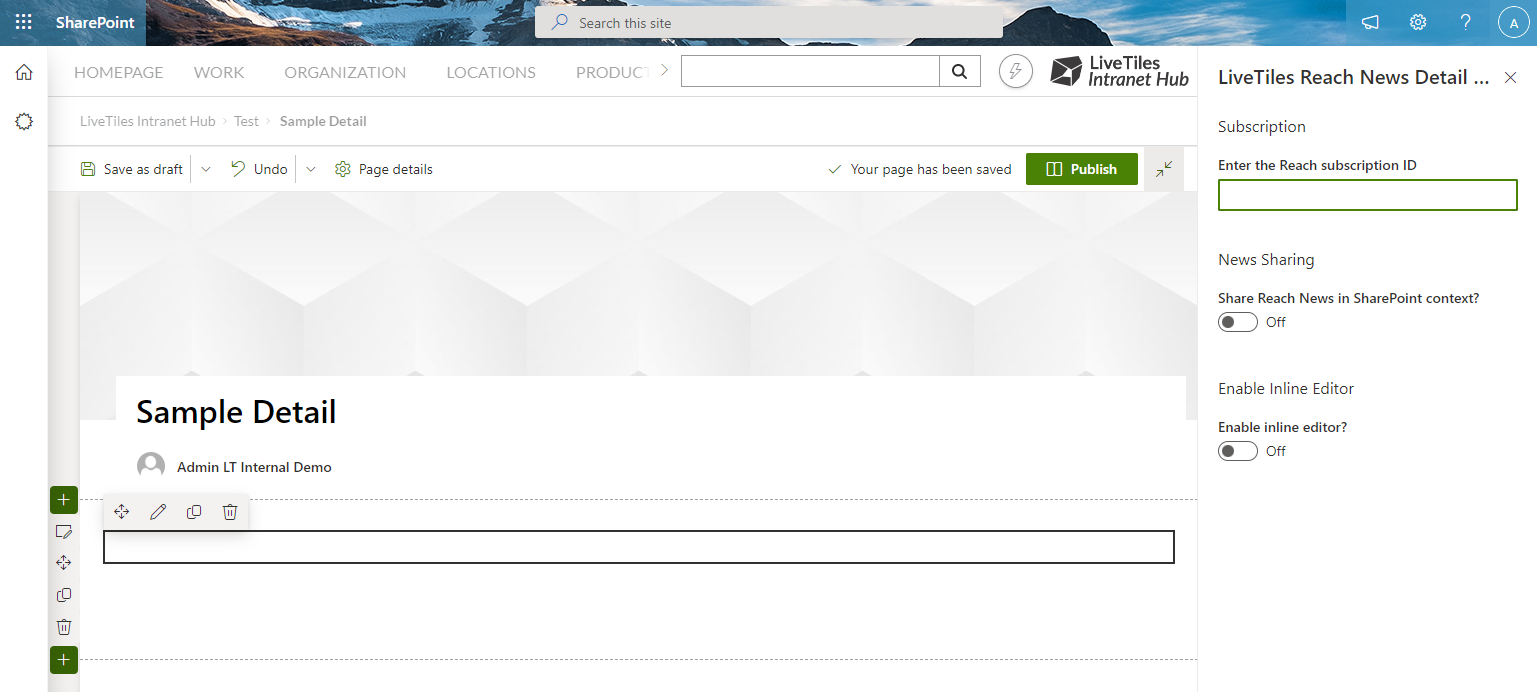
The Detail View Web Part comes packaged with the Reach Events app package and requires the Reach Events web part to be installed on a SharePoint page. Once installed create a new SharePoint page to add the Detail View Web Part. To add the Detail View Web Part switch the page to edit mode and click the plus icon to add a web part. Select the Reach Events Detail View.
Once the web part is added to the page you will see a placeholder for the Detail view and you must enter your subscription Id in the settings pane.
Usage
To use the Detail View you must go to the page where the Reach Events web part is installed and open the property pane to edit the settings for Detail View.
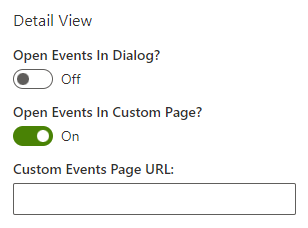
In the Detail View settings you have 2 toggles for opening your event items. If you toggle off the "Open Events In Dialog?" you will see a new toggle appear for "Open Events In Custom Page?" with a input box for "Custom Events Page URL:". Inside the input box you can add the URL for the page that has the Detail View Web Part installed.
Note: You can use a full URL in the input box or a relative URL
- Relative Url /sites/SitePages/<-Your detail view page->.
- Full Url https://<-Your-Tenant-Url->/sites/<-Your detail view page->
Once added and the page is published, When you now click an event item it will open it in the Detail View page.
If both toggles are set to off, when clicking an event item it will open it in the Reach web app.
Detail View Event Item Editing
In the detail view toolbar you can click the pencil icon to edit your news article in SharePoint.

Detail View Single Page Web Part
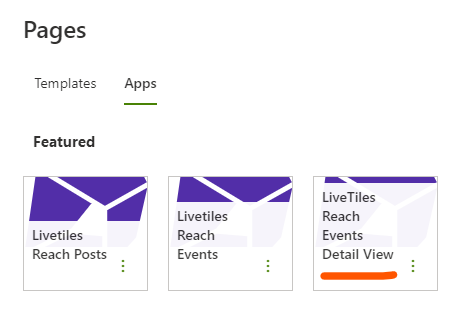
To add the Detail View Web Part as single page web part you create a new SharePoint page.
In the apps tab select theReach Events Detail View Web Part and click create.
Once the page is created you will need to add a title and your Reach Subscription ID and click save.
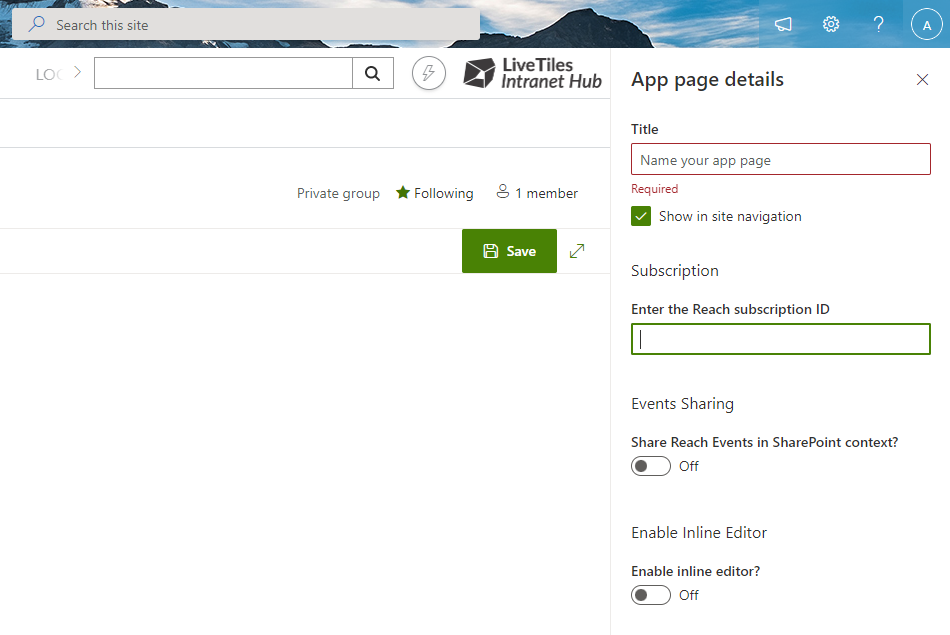
You can then add the URL of this page to the Reach Event web part Detail View Custom URL input box to display the event item on this page when it's clicked.